
How to Repair Your RV After It Has Been Flooded
Having a recreational vehicle makes life much easier. You can travel in both style and relaxation, bringing some of your home comforts with you. Purchasing an RV will, of course, necessitate a significant financial outlay. As a result, if you want to get the most out of it, you must keep it in good condition. We do understand, however, that there may be times when you experience RV water damage. Here are some pointers on how to restore your RV after it has been flooded.
Determine and repair the source of RV water damage
There may be discrepancies in the extent and severity of water damage between what happens in your home and what happens in your RV. The initial step in resolving both, however, will always be the same. You must find and repair the source of the water. Here are some things to keep an eye out for during your inspection:
- Check for leaks, especially along the walls and roofing.
- Examine the roof for any soft places, especially at roof vents or areas where the roof has been chopped off to install AC units, TV antennas, and plumbing.
- Any browning and wrinkles in your wall, especially around windows, doors, and other openings, indicate that seals have become dislodged and are no longer effectively keeping water and humidity out.
- Don't forget to look in the cabinets and compartments.
- Finally, don't simply conduct these examinations if you fear there is already water damage. Do it on a regular basis, especially during the rainy season, as you will encounter exceptionally muddy roads on your trips.
Remove any dirt
When it comes to mud, there's likely to be some dirt and grime involved. If you want to minimize stains as much as possible, don't wait for it to completely dry. You may also use this time to analyze the damage as you move over each section of your RV, since this will allow you to distinguish between simple staining and genuine deterioration.
Remove any damaged components
After you've recognized the damaged portions, the next step is to get rid of them. This may prevent the damage from spreading and may even allow you to salvage other pieces that haven't yet been damaged. It's important to recognize that water damage promotes mold growth, and it can spread. It can even have a negative impact on the inside air quality of your RV and make passengers sick, which is something we want to avoid.
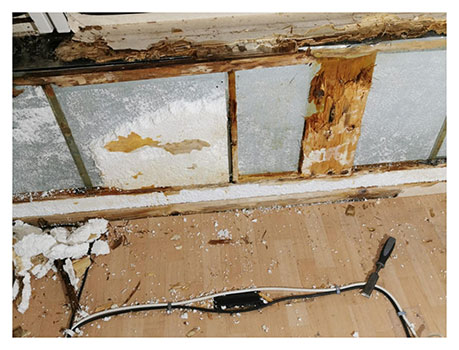
Floor
Plywood is commonly used for RV floors. This material is extremely susceptible to water damage. Older models are even more so because they aren't built with the extra layer of security that modern models are.
It's not the most graceful method, but getting down on your hands and knees and pushing towards your flooring is the best approach to check for rotting. Keep an eye out for flexing or softer, mushier areas. You can also use a screwdriver to push through the exposed wooden parts of your floor to examine if any of them are rotting. There is no salvaging rotting timber. The only method to rehabilitate deteriorating flooring is to totally replace them.
Walls
As previously said, water staining, discolouration, and wrinkling wallpaper should be avoided. Taking off your wall covering will also assist disclose any damage that is occurring beneath it.
- Check that the measurements of your window opening are correct (and not your old window).
- Align the foam tape seals beneath the window rather than on top of it.
- Before installing your foam seal, spray it with water. It will aid in increasing its water resistance.
- From the outside, install your window. Screw it tightly to the inside frame after pushing it flat.
- Why not replace your RV window curtains while you're at it?
Eliminate Any Mold Growth
Mild to slightly severe illnesses can still be treated with a cleaning solution consisting of four parts water and one part bleach. Mix it completely, pour it into a spray bottle, spray it directly on the problem area, and let it soak for a few minutes before scrubbing it away.
Extremely severe cases, on the other hand, may necessitate the services of a mold remediation business. If you decide to do the removal and cleaning yourself, make sure to wear the right personal safety equipment, such as a face mask and a pair of gloves.
Allow the air to dry completely
When you're through cleaning, rinse off the bleach solution with soap and water and let your RV air dry entirely. You might also purchase an air blower. It's a piece of equipment that uses pressure to create more ventilation. It is useful for drying out interiors as well as drying out excess moisture that can cause water damage.
All damaged areas must be replaced
Finally, all that remains is for you to replace the broken pieces that you removed previously with new ones. Try to spend as much money as possible on high-quality parts. While they may be more expensive, they will endure longer and prevent the extent of water damage that you have just experienced from occurring again.
Repairing Water Damage in an RV
There are several methods for protecting your RV from water damage. Inspecting leaks and broken seals in your vehicle on a regular basis, for example, might already save you a lot of trouble.
If water damage does occur, however, know that there are techniques to restore your RV to its former splendor. In order to pinpoint the root of the problem, look for broken parts. Remove any seriously damaged components. Remove the moldy residue. And, of course, new parts should be used to replace the damaged ones. We wish you the best of luck on your journey!
This Is All Too Much
If you are like most people and this is all too much for you, then visit your friendly CaravanXpress service department who will only be too pleased to take care of this for you.